How to Find a Roof Leak
First, we'll explain how to spot a leaking roof. You may already suspect or even know that your roof is leaking, but it's important to be aware of the signs of a leaking roof so that you do not miss evidence of an issue.

It is essential that you find a roof leak quickly to prevent the issue from worsening. Failure to fix it as soon as possible can lead to mould, rotting, and sheathing in the best-case scenario.
Or in the worst case, ceiling damage, the destruction of insulation, and even core structural damage to your home. What starts as a relatively straightforward repair could turn into much bigger problems if a roof leaf is not properly addressed.
The Signs of a Leaking Roof
The first part of finding a roof leakage involves knowing the signs. For evidence from the exterior of your home, watch out for:
- Roof tiles that are buckling
- Roof tiles that are curling
- An accumulation of moss
- Roof shingles that are cracked or absent
- Flashing with damage

The signs of a leaking roof from inside your home include:
- Damaged loft
- Musty scent within the loft
- Ceiling with damp patches
- Ceiling with dripping water
Steps to Finding a Roof Leakage
We'll now take a look at the step-by-step approach to narrowing down and finding a roof leak.
Here are the steps required:
1. Spot The Signs of a Roof Leak
First and foremost, you'll need to detect the signs of a roof leak. This will help give you an idea of where the roof leak is located approximately.
The signs mentioned in the previous subsection are some of the most common examples. Please note that where you first spot evidence of the leak may not actually be where the leak itself is situated.
2. Take a Look In The Attic
The next step you should take involves checking out your attic. Carefully head up if it's safe to do so, either with a torch or by turning on the light (if you have one in the loft).
You'll want to keep an eye out for mould, black marks on the rafters, roof sheathing, and damp stains. Also, watch out for nails that are exposed that may be letting water in.
3. Rain Dance
Unless you've already had success, then the best way to spot a leaking roof involves getting up on to the roof and spraying water from a hose on different sections of the roof.
The purpose of this approach is so that a helper in the loft can watch out for when (if) the water from the hose comes through the roof and where.
This will obviously signify the location or locations of the leak. It's a common and generally effective tactic.
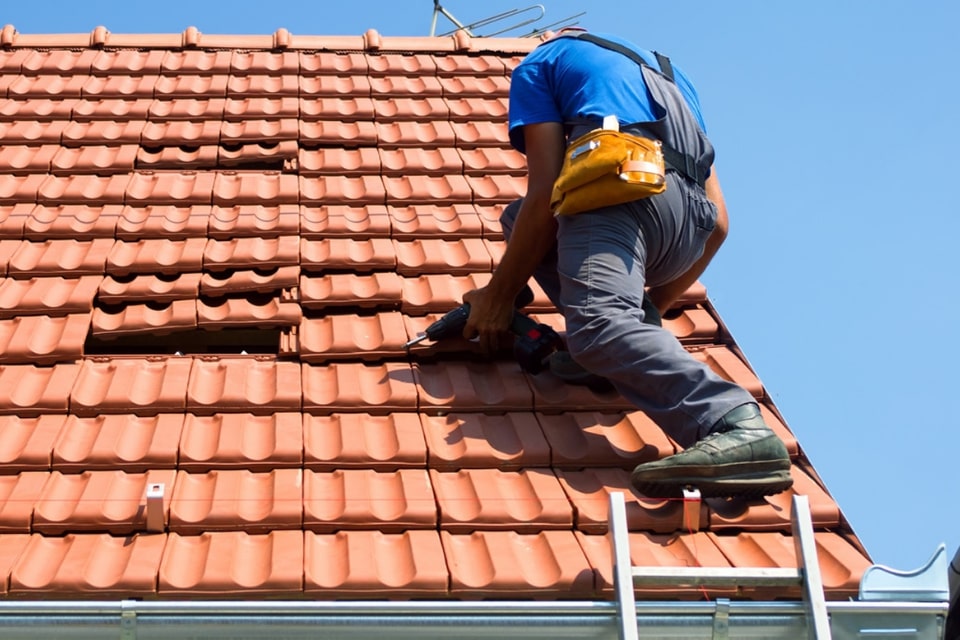
Remember, you must take the necessary safety precautions when undertaking these tests. A ladder and plenty of caution are vital.
It's important that someone holds the ladder from the bottom while you're using it. You should also use a safety harness.
You may want to have walkie-talkies to keep in contact with your helper, or you could, of course, just use phones to communicate. An internet message-friendly app would suffice to save both of you credit.
4. Hire a Professional
If you have any doubts or concerns or if your attempts to find a leak using the rain dance approach fails to determine the location(s) of leakage, you should hire a professional.

You may even prefer to do this, purely for safety reasons or/and if you're uncomfortable with getting up on to the roof yourself.
How to Inspect a Roof Leak
Once you've figured out where the leak originates, the next phase toward repairing the leakage involves inspecting the area.
To the extent that's possible, you should check all the leaking areas to precisely identify why the leak is occurring.
The damage may present itself inside the loft or atop the roof itself. If you are going on to the roof to perform an inspection, you should take all of the necessary safety precautions and ideally wear a safety harness.

Either way, it's important to have someone on the ground to hold the ladder from the bottom while you're on it.
A gaping hole in the roof would make a diagnosis fairly easy, but a roof leak is often harder to explain.
There are so many possible explanations, unless you can confirm the source(s) of leakage, you should hire a professional to help out with this part, at the least.
How to Fix a Roof Leak
There are several ways to repair a leaking roof, and they will vary depending on a range of factors. Let's take a look at some common approaches.
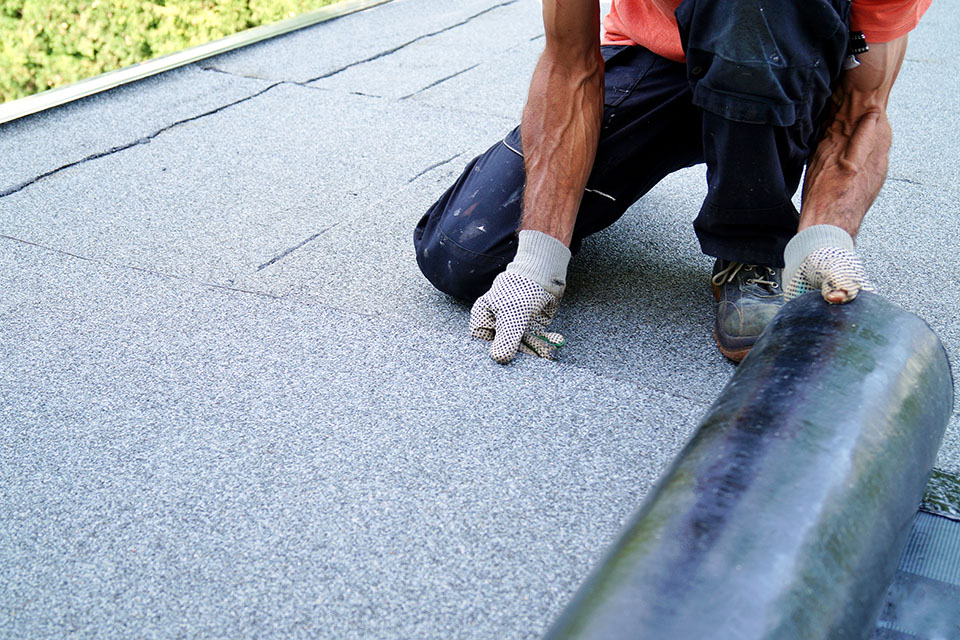
Fixing Leaking Roll Roofing
If you have roll roofing atop your house, then you will need to take specific steps to repair a roof leak in this case.
We'll now delve into the steps needed to fix roll roofing that is damaged, such that it's leading to leaks.
1. Watch Out for Blisters or Cracks
First, look for damage on the outside that appears to represent the exterior of a leaking area that has lead to damp stains on the ceiling in the loft.
This will likely be in an area approximate to where the leak is occurring within, although not necessarily.

The leak may be elsewhere on the roof, so it is ultimately the sight of the damage that you're looking for.
Water can sometimes travel through a crack or damage in a roof and make its way to another part of the loft before dripping through.
Watch out for tiny cracks along the chimney, vents, and joints, or other elements on the roof also. You may find a clear split in the roofing or bubbles/blisters in which water/air has accumulated.
2. Repairing Minor Damage
Roofing sealant can be employed to fix a tiny gap at a vent, joint, or chimney as long as the gap is no larger than a quarter of an inch.
Likewise, gaps greater than 0.25 inches, blistered area, or open splits should be repaired by patching.
For rubber or asphalt roll roofing, repairs are relatively easy. Still, if you spot extensive water stains, mould, rot, or general wear, you should hire a professional as there is a high risk of missing some damage or insufficiently fixing the damage on a DIY basis.
3. Cut Blisters/Bubbles
Another phase of this method, which may or may not be necessary, depending on the nature of the problem, involves releasing trapped air and water in blisters/bubbles. If there are no blisters or bubbles, move on to step four.
To do so, first, you should sweep off gravel from the area of damage before cautiously slicing through the centre of the blister using a utility knife.
It's important that you cut through the top layer of the roofing where the blister is present. Avoid cutting through the fiberboard or roof substrate that exists beneath the top layer.
If the blister contains water, it can be soaked up with a cloth. Once the water is fully absorbed, give the roofing area 1-2 days to fully dry.
If you can't wait that long, a blow dryer can be used, but it must be entirely dry before you try to undertake fixes.
4. Add Roofing Cement
Next up, you may need to apply a significant amount of roofing cement beneath the split. You should also check the fiberboard substrate below the tear.
If the fiberboard substrate is not sound, the damaged area will need to be fully replaced. However, assuming the substrate is sound, a small trowel can be used to add a large layer of cement below the edges of the ripped section.
It's important that the cement is pushed as far beneath the edges as possible so long as it does not risk widening the existing tear. Common sense is important here to make sure you achieve the right balance.
Once you've cemented the edges of the rip, press the roofing parts flat down before hammering galvanised roofing nails into place along both sides of the mend. These should be fitted in 7.6cm intervals.
5. Replacing the Substrate
It may be required to replace the roofing substrate. If there is a large open seam, you should inspect the roof substrate for holes or signs of rot.
You should employ a sharp utility knife and a straightedge to remove the area of the damaged roofing substrate.
It's important to cut a rectangular section out that consists of the entire damaged area. Metal washers and screws that are used to fit the roof substrate in place should also be removed.
Then, cut out a roof substrate section based on the rectangular section that has been removed. This can be done by cutting out an appropriately sized segment of a high-density fibreboard section.
Fix the new substrate into position before securing it in place with 3.8cm roofing screws that feature in-built hex washers.
6. Covering the Area With Roll Roofing
Let's say you didn't need to add a fresh roof substrate. In this case, you should cut out a segment of rubber roll roofing or tar paper with a width of 30cm and with a length that surpasses the already repaired section.
Add a substantial amount of roof cement over the repaired area before fitting the rubber roll roofing/tar paper section into place.
It should be pressed down gently before 3.2cm galvanised roofing nails are added around the edges of the patch in 7.6cm intervals.
If the substrate has been replaced, you should add a sufficient number of layers of new roof rolling patches until the roof section is flush with the roofing material that surrounds it.
In this case, add the tar paper/rubber roll roofing following the same steps discussed above. With the nails in place, it's essential that they are not overlapping the hardware employed to fix the fibreboard substrate into position.
7. One More Layer of Roofing Cement to Prevent Future Leakage
Finally, you should add a top layer of roofing cement to secure a waterproof patch to prevent future leaks. A trowel can be used to add a heavy layer of roofing cement over the whole area that was repaired.
The cement should be spread over the perimeter of the patch. It is vital that the nail heads are wholly covered.
A putty knife is the best tool to feather the cement beyond the edges of the patch. Ideally, the cement surface should be made nice and smooth so that it will not see an accumulation of water in the future, such as after heavy rain.
In the scenario that your roll roofing is made of asphalt, a layer of asphalt gravel should be applied atop the cement before it dries. The purpose of this is to ensure that the roofing material is properly protected.
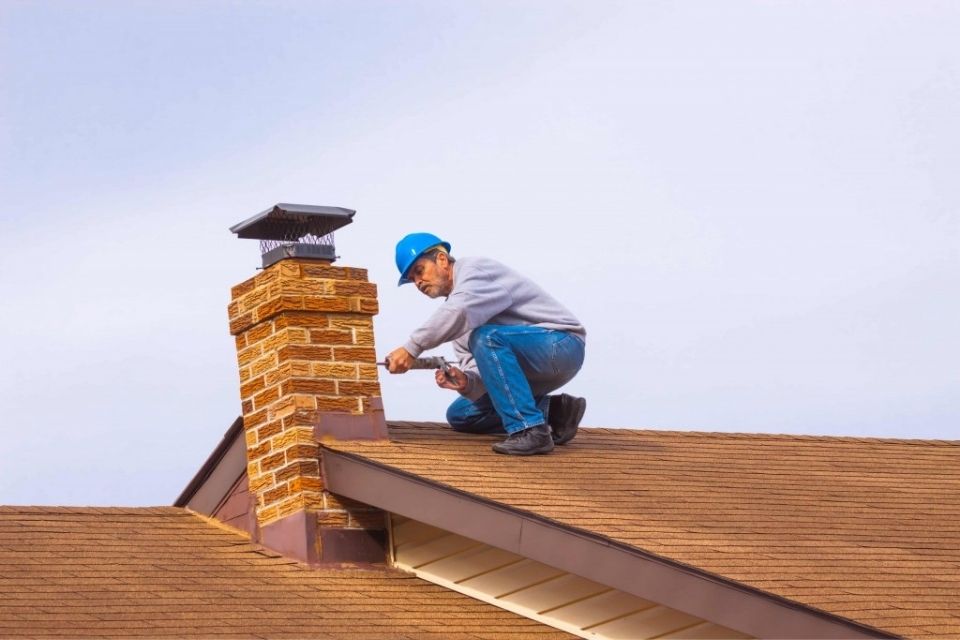
Seal Joints with a Leakage
If you find that there are leaking joints, such as around a valley or chimney, this approach is for you. Let's break down the steps of performing these types of roof leak repairs.
1. Inspecting Any Gaps
If you find gaps in sealant, caulk, or aluminium flashing at points in which objects/elements intersect with the roof or arise from it, then this may be the reason for a roof leak or at least one of the reasons.
In fact, joint leaks are one of the most common reasons for roof leakages. It's usually relatively easy to fix small gaps.
Let's assume that the sole cause is an issue with the joints. To deal with small gaps, roof sealant or caulk can be employed.
However, if the gap (whether a tear or crack) is sufficiently large, new flashing or patching may be needed.
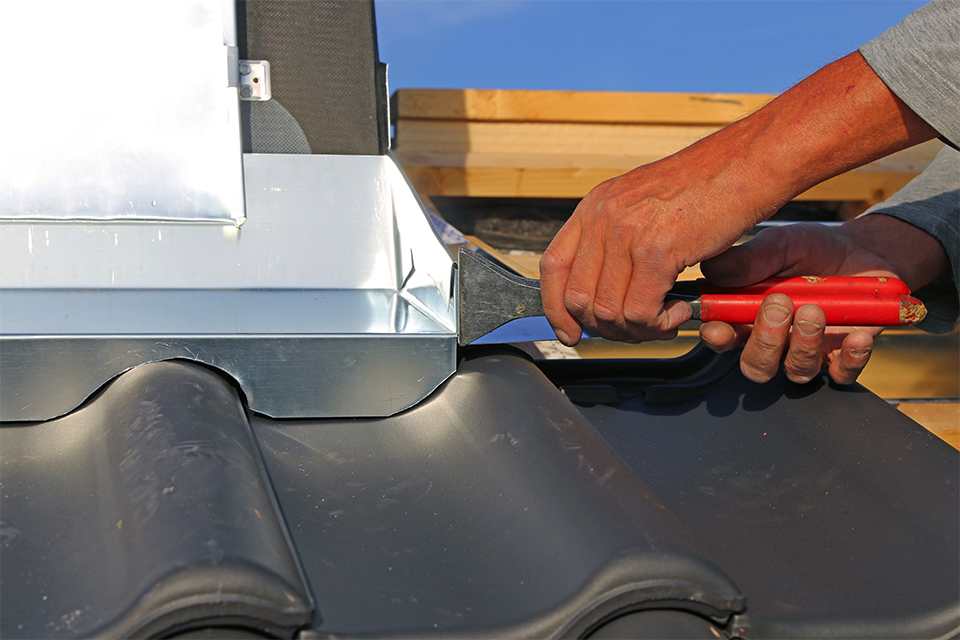
2. Fixing Rusted/Loose Flashing
Metallic flashing that has loosened can be fixed with the application of a roof cement bead below. This should then be pressed back into its correct/original position.
In the case that a small section of flashing has rusted, you can slide a new part of galvanised steel flashing below the area that is rusting before sealing it by using an effective roofing cement product.

If shingles adjacent to your roof's flashing have loosened, you should not nail the shingles on the side that touches the flashing.
Alternatively, it is best to bond the shingles back to the flashing with roof cement. This way, you won't end up creating punctures in the flashing.
3. Add Roof Sealant/Cement to Small Gaps
For gaps with a width of less than 0.64cm, you should use this approach/step. It would be best if you scraped away the old sealant before wiping the debris away, and then ensure that you dry the area entirely before adding a fresh compound.
Next, a flexible and thin putty knife should be used to add roof cement to minor cracks in the sealant that surrounds the joined surfaces (e.g. chimney).
A bead of water-resistant silicone-based caulk can be applied to small gaps at the rubber or metallic collar of an exposed vent or pipe.
A caulking gun can be employed for this task. Gaps that are greater than 0.64cm will need a more significant fix beyond a quick sealant.
4. Replace Substantial Areas of Failing Flashing
If large sections of flashing are failing, they may need to be replaced. You can pry off the area of flashing that is unstable, as well as the old roof cement using a pry bar or chisel.
Next, measure the vent, chimney, or the given joined area. Then, employ straight cutting tin snips to remove a pre-bent base flashing section that should be fixed to the joint. Flashing should overlap the joint by roughly 10cm on both sides.
Then you should wrap flashing around the roof joint before sealing it using caulk or roofing cement.
If there are nail holes on the edge of the flashing, you should fit galvanised roofing nails into the holes.
Should you have a shingles roof, it's best to remove the shingles so that you can gain access to the old flashing.
If required, replace the shingles and fix them to the flashing using roofing cement. Correcting the flashing that surrounds the chimney can be a tricky job, and sometimes customised materials will be required.
As a result, you should hire a professional if you have any doubts.
Other Methods
Though the above methods are some of the most common fixes, other approaches may be required, such as replacing asphalt shingles, damaged wood shakes, or repairing rotted or broken eaves.
Sometimes asphalt shingles can be repaired by straightening and reattaching curled shingles. Alternatively, roof sealant may be needed if there is a clean crack, or it'll simply need to be replaced.
However, wood shakes that are damaged should almost always be replaced to stop a leak. The same applies to broken or rotted eaves.
Fixing a Leaking Flat Roof
There are broad differences between fixing a flat roof leak and repairing a pitched roof leak. Let's take a look at what's involved in repairing a flat roof leakage.
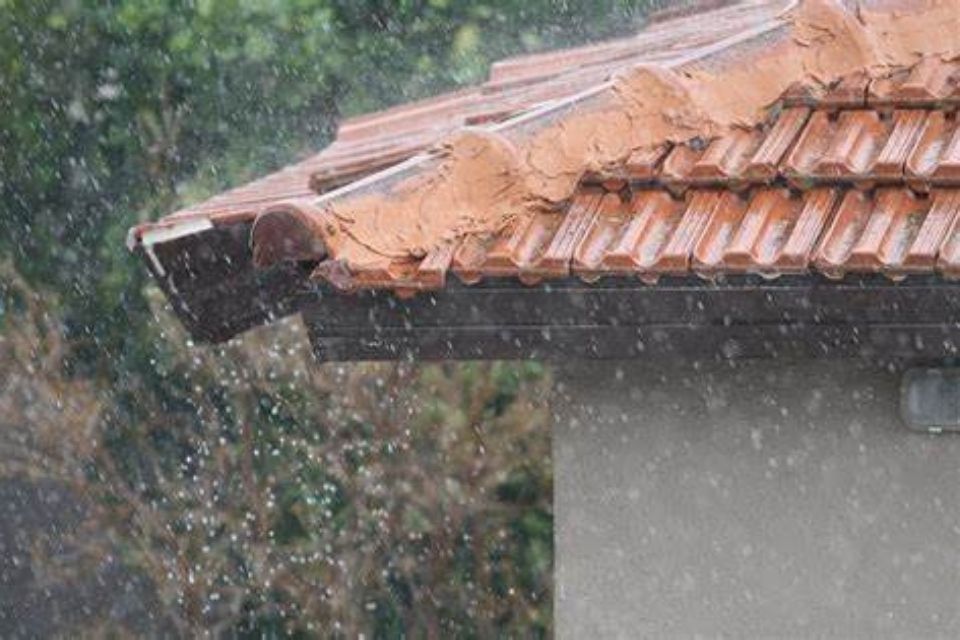
Given that flat roofs lack any inclines, this means that water and dampness can accumulate in given areas of the roof and are less likely to disperse in a way that naturally occurs with a pitched roof.
For this reason, moisture can eat into the roof, causing damage and resulting in a roof leak over time. If your flat roof consists of a single membrane, there is a risk that it could buckle over time due to the elements and wear and tear.

A crack in the roof or issue with the flashing may also arise. These issues can be fixed in much of the same ways as discussed in the previous section, such as replacing flashing, replacing roofing material, or repairing a cracked area of the roof.
You can undertake this work DIY so long as you know what's involved and take the necessary safety precautions.
In some cases, the work may be especially complex and is best fixed by a professional.
Fixing a Pitched Roof Leak
As with pitched roofs, leaks can occur in a different manner due to the implication and intersecting elements of the roof.
At intersecting points, damage may occur over time, and this will need the sort of repairs discussed previously for sealing joints.
With a roof being pitched, water is unlikely to accumulate in the same way as it might on a flat roof.

Among the most common ways a leaking pitched roof could be repaired are roll roofing repairs, fixing leaking joints, replacing roof shingles and the substrate beneath the roof's surface layer.
Other fixes include replacing flashing or fixing old flashing back into place. As with a flat roof, this work may be undertaken DIY once you understand exactly what's involved and the necessary safety steps. If in doubt, hire a professional contractor.
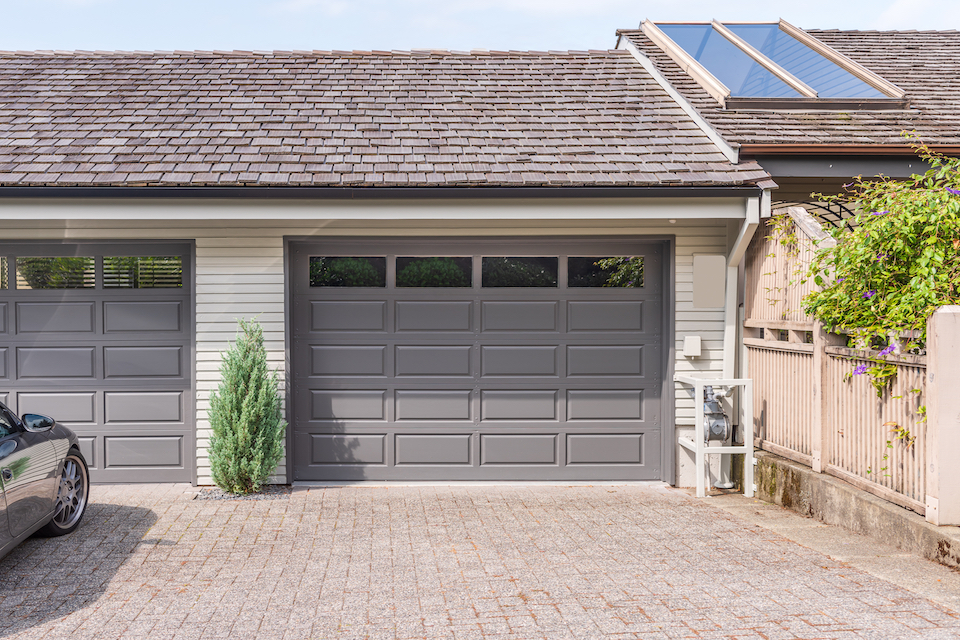
Repairing a Garage Roof Leak
The steps needed to fix a garage roof leak will depend on the type of roof. For a flat garage roof, water may accumulate. Other issues that could arise are moss and lichen covering a given section of the garage roof.
Depending on where the garage roof is located, it may be better protected from the elements than the rest of your property or worse off.

If the garage roof is pitched, similar approaches to those discussed in the prior section will apply, albeit it's, of course, unlikely to have a chimney.
For a complex job such as a whole reroofing, a professional will most likely be required. For smaller work, and if you are sure of what's involved and take the right safety steps, it's possible to perform fixes by yourself.
Repairing a Conservatory Roof Leak
To fix a conservatory roof leak is quite similar to fixing a pitched roof leak in general. However, the difference is that with windows, there is always the chance that the window seams or even the glass are the cause of the leak.

In most cases, a sealant will suffice, or conservatory roof repair tape may do the job. A professional will be required if the job is particularly challenging or/and extensive. For simple fixes, they are generally suitable for a DIY enthusiast.
Roofer Cost
In this section, we'll look at the labour rates involved in hiring a professional roofer. On average, a roofer charges about £18 to £25 per hour in the UK, that being approximately £150 to £250.
Costs of fixing roof leaks can vary significantly depending on the roof's size, the extent of the damage and so forth.
To simply repair or replace several roof tiles might cost about £150 to £200. To replace a garage roof, however, could cost up to £800 to £1200.
You'd likely pay £6000 to £11,000 to replace a larger roof, such as a semi-detached house. Replacing flashing usually comes with a price tag of £200 to £300.
You'll likely be able to have a sagging roof fixed for £1000 to £2000.
FAQs
Q: Is a professional required to fix a leaking conservatory roof?
A: Often, a DIY enthusiast will be able to fix this problem themselves, so long as they understand exactly what's involved and use the right safety approaches.
However, for particularly complex or extensive leaks, or/and where the homeowner is not entirely sure of how to fix the problem (or how extensive the problem even is), then a professional should certainly be hired.
Q: How do you repair a leaking flat roof?
A: In most cases, you'll simply need to replace a given section of the roof. However, it will really depend on the nature of the issue.
Q: What is the common reason for a roof leak?
A: Most of the time, a roof leak occurs simply because a roof has worn down over time due to it being an old roof.
Q: Is a roof leak covered by insurance?
A: Unfortunately, this is usually not the case. However, in some circumstances, insurance will cover roof repairs. If you're unsure, you should contact your insurer.
Q: Do I need planning permission to have my leaking roof repaired? And what about building regulations?
A: It's very unlikely that you'll need to apply for planning permission or submit an application for approval concerning building regulations.
For the latter, it may be the case if you were to somehow change the structure of the roof. The new roofing element(s) will be substantially different from the previous element(s) regarding their resistance to fire or if you intend to replace or repair over 25% of the roofing area.
In the latter case, building regulations assert that the roof thermal insulation would generally require improvements. If you are uncertain about anything, it is best to contact your local council.
Sources
- https://www.roofingmegastore.co.uk/blog/find-fix-roof-leak.html
- https://www.budgetdumpster.com/blog/diy-steps-on-how-to-find-a-roof-leak/
- https://wernerroofing.com/blog/6-most-common-flat-roofing-problems/